Designing a conference room can be tricky. We need to spend time, much like an architect presenting a building design, to show the client how the room will look post-installation.
Otherwise, the client may not be impressed. Demonstrating the setup, camera coverage, and microphone range can make the client more interested. However, manually doing this can be time-consuming.
Cisco has released a tool for designing conference rooms called the Cisco Workspace Designer. You can access the page from this link https://www.webex.com/us/en/workspaces/workspace-designer.html
Once logged in, you have the option to design small, medium, large, and executive board rooms. More features are expected to be released soon.
Let’s explore the features and design an Executive Board Room.
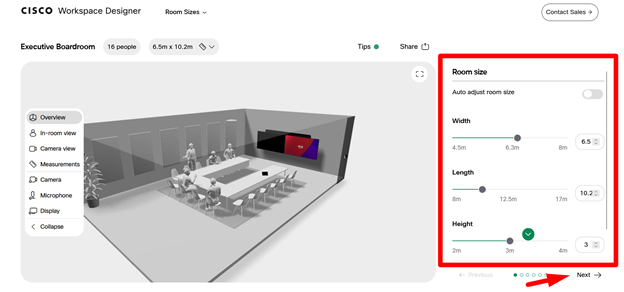
- Get the size of the room and provide those details in the Room Size section, then click Next.
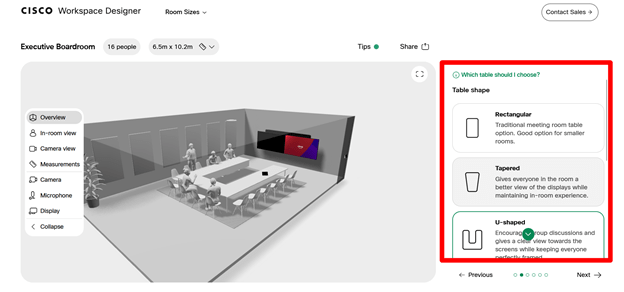
- Select the table type. The table can be rectangular, tapered, or U-shaped, which are common table types seen in board rooms. Select the table, then click Next.
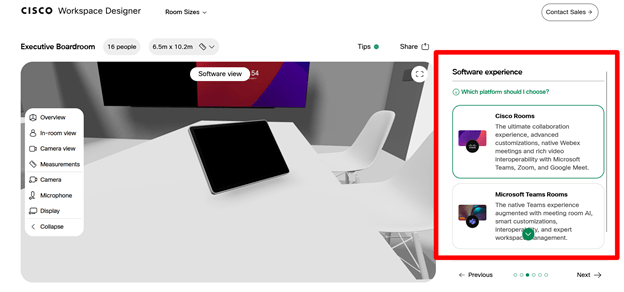
- Now select the experience. Cisco devices can work with Webex (Webex experience) or Microsoft Teams (Teams experience). Select the experience, then click Next.
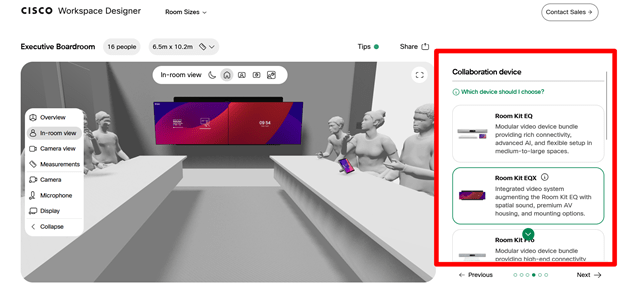
- Based on the room size and the table provided, the tool will recommend devices, highlighting the most suitable options for the room. Select the Device, then click Next.
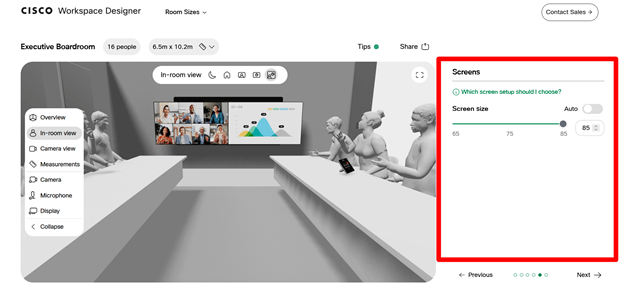
- Design the screen size.Select the Screen Size , then click Next.
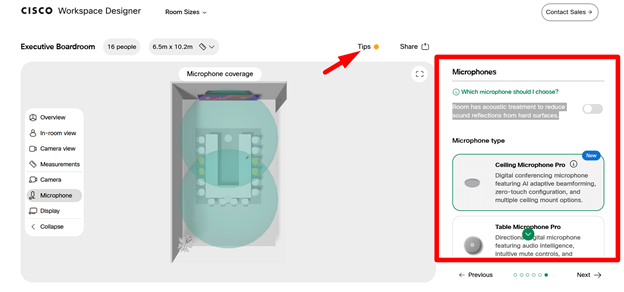
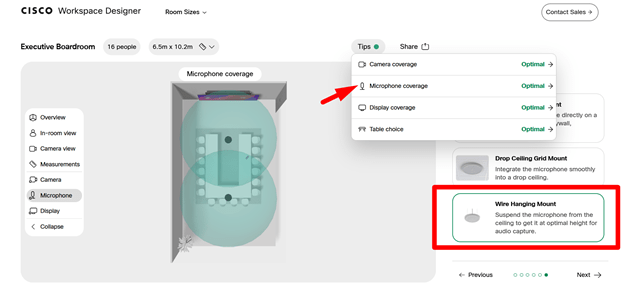
- Select the microphone type.
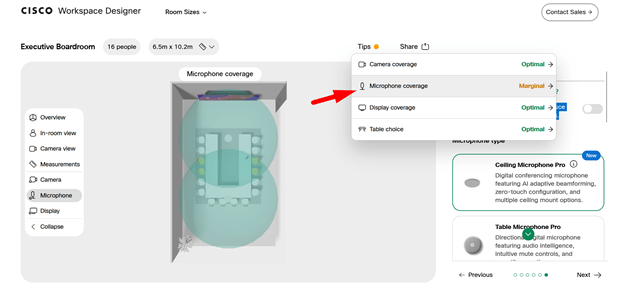
Choose either ceiling or table microphones. There is an option to select if the room has acoustic treatment done. In my case, the TIP indicates there could be marginal coverage for 10 seats when I turned on the selection switch for “Room has acoustic treatment to reduce sound reflections from hard surfaces.” So, I have added two ceiling microphones. You can choose the color of the microphones, and I opted for the wire hanging mount to achieve optimal coverage.
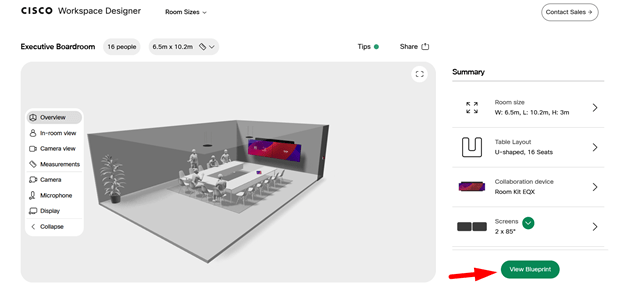
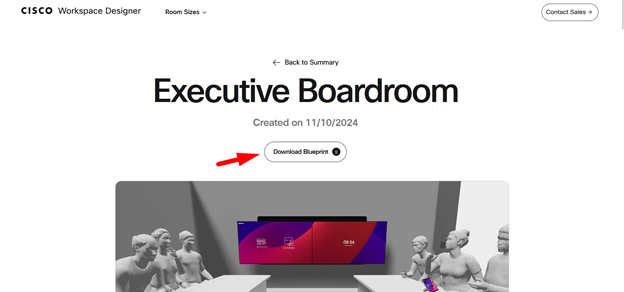
- Click Blueprint. You now have the file ready to share with the customer.
Download the file as a PDF and save it on your PC. Then, share it with the customer.
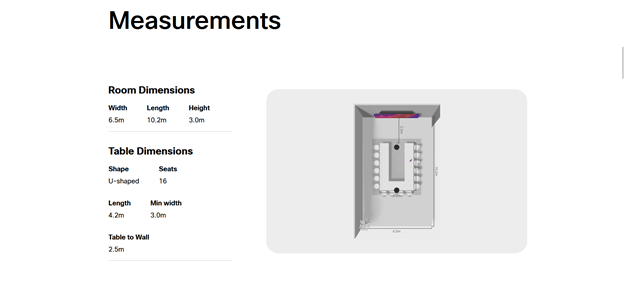
The blueprint will include the following:
- Measurements
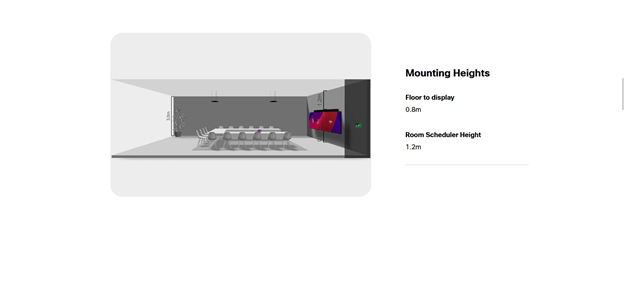
- Mounting Heights
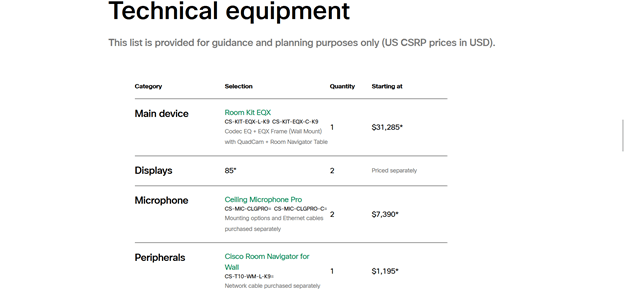
- Technical Equipment
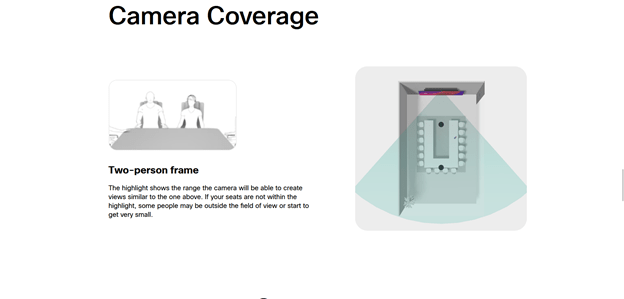
- Camera Coverage
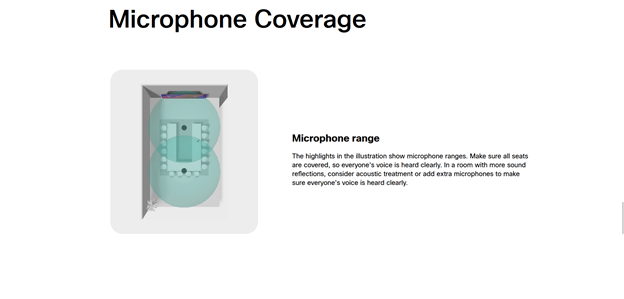
- Microphone Coverage
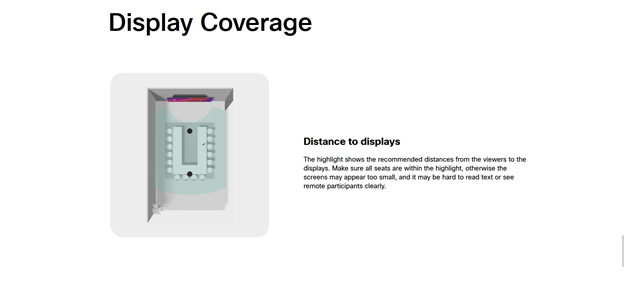
- Display Coverage