I was working on Cisco’s 9115AXi-E Embedded WLC this morning. Its an amazing product. In less than 5 mins i was able to setup my Wireless network.
We can configure WLC using
- Option 1:- CLI
- Option 2:- WebGui
- Option 3:- Mobile APP.
I did my deployment using Mobile APP and i share the details of how I setup my WIFI using Mobile APP.
Verifying WLC configuration.
SSID User-WI-FI and Guest WIFI

Note:-Unlike a 9800 controller, EWC flash memory does not have enough space to store all AP images. All the AP images need to be hosted on an external TFTP or SFTP server. When a second AP tries to join, EWC will point it to the external server. Without the following commands, no other AP will be able to join it:
EWC(config)#wireless profile image-download default
EWC(config-wireless-image-download-profile)#image-download-mode tftp
EWC(config-wireless-image-download-profile-tftp)#tftp-image-server 192.168.1.25
EWC(config-wireless-image-download-profile-tftp)#tftp-image-path /

EWC#write memory
Deployment Guide.
Connecting to the Provisioning SSID
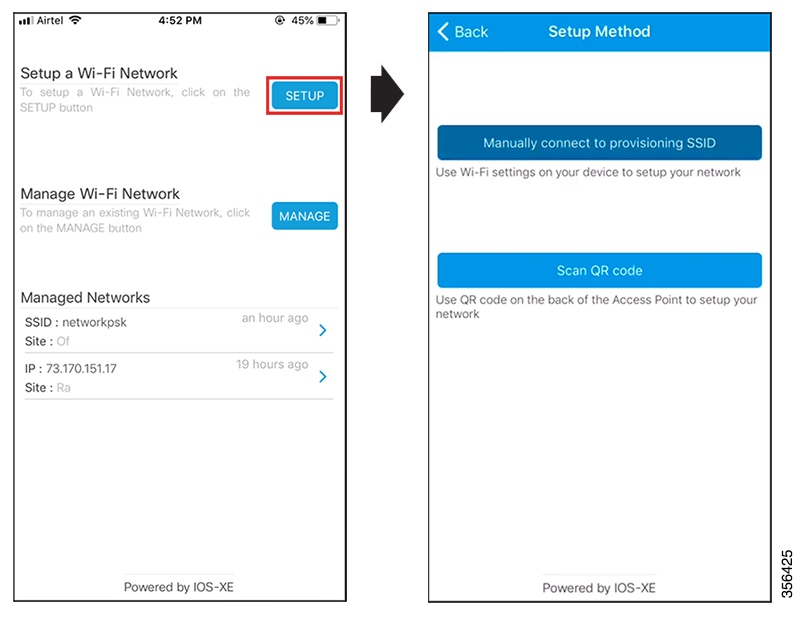
To connect to the provisioning SSID, use either of the following methods:
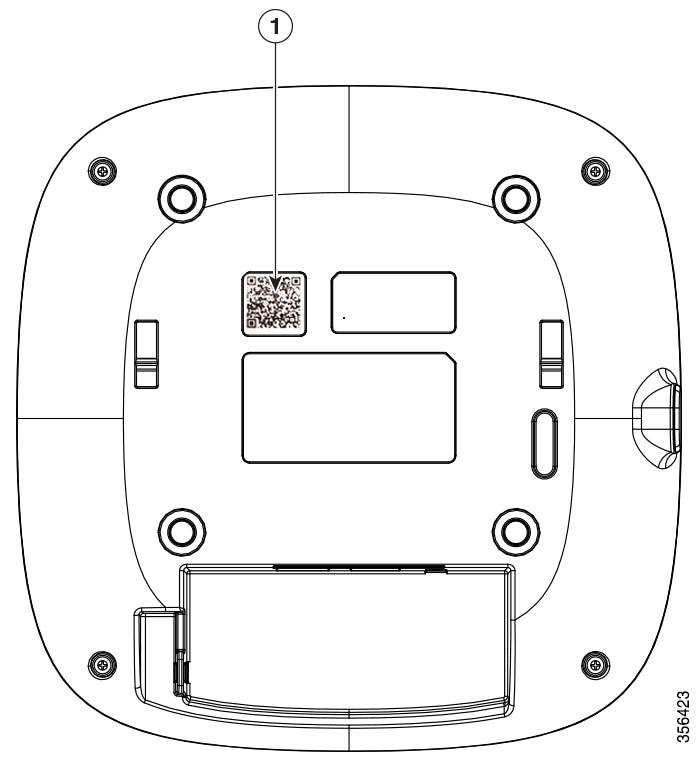
Scanning the QR code
You can locate the QR code on the back of your Cisco Catalyst Series access point. If the access point is capable of becoming a Cisco Embedded Wireless Controller, you can use the Cisco Catalyst Wireless mobile app to scan this QR code and automatically provision the AP to set your Wi-Fi network up.

Manually Connecting to the Provisioning SSID
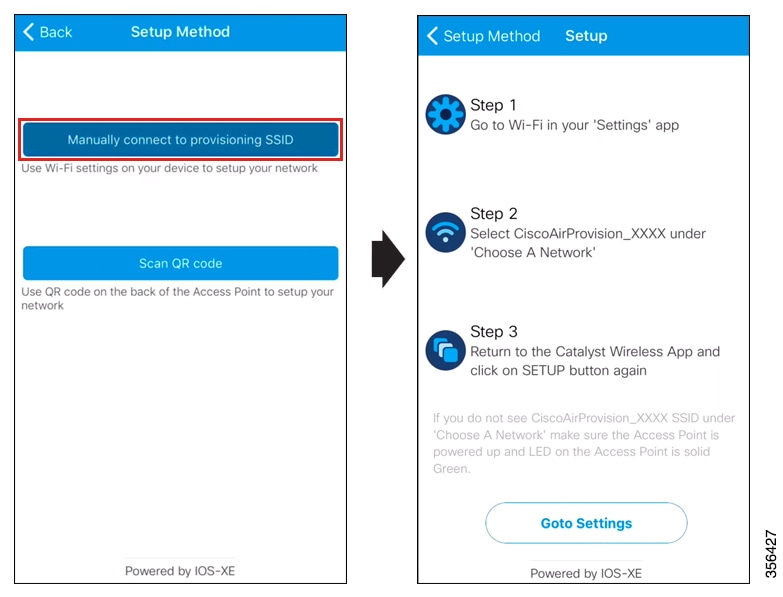
Procedure
| Step 1 | Under Settings in your mobile device, go to Wi-Fi. |
| Step 2 | Under Choose A Network, select CiscoAirProvision-xxxx from the list of available SSIDs.. |
| Step 3 | In the Password field, enter the default password for the CiscoAirProvision-xxxx SSID. |
| Step 4 | Click Join. Your mobile device is now connected to the CiscoAirProvision-xxxx SSID. |
Troubleshooting Connecting to the Provisioning SSID
Problem During SSID provisioning on your Android device, the login screen is repeatedly displayed in the mobile device browser.
Solution Manually navigate to the Cisco Catalyst Wireless mobile app to continue using it.
Problem If your mobile device is connected to the desired SSID but the error message “Please check your Wi-Fi connection and try again.” appears. Note that this error might also appear during Day 1 setup.
Solution Switch off your mobile data and connect to the provisioning SSID.
Problem In Android 6.0 (Marshmallow) or later versions, you may receive the error message “Connection to SSID ssid-name failed” even after repeated attempts to reconnect to the desired SSID. For more details, visit https://developer.android.com/about/versions/marshmallow/android-6.0-changes#behavior-network. Note that this error might also appear during Day 1.
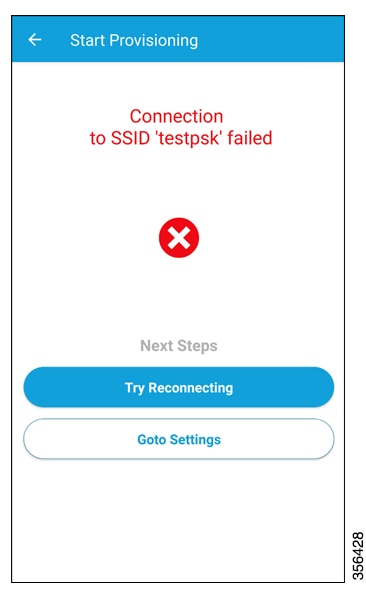
Solution Under Settings > Wi-Fi > Choose A Network in your mobile device, do either one of the following:
- Solution Navigate to the desired SSID, and click Forget. After waiting for some time, return to the Cisco Catalyst Wireless mobile app to continue usage.
- Solution Manually connect to the desired SSID and return to the Cisco Catalyst Wireless mobile app.
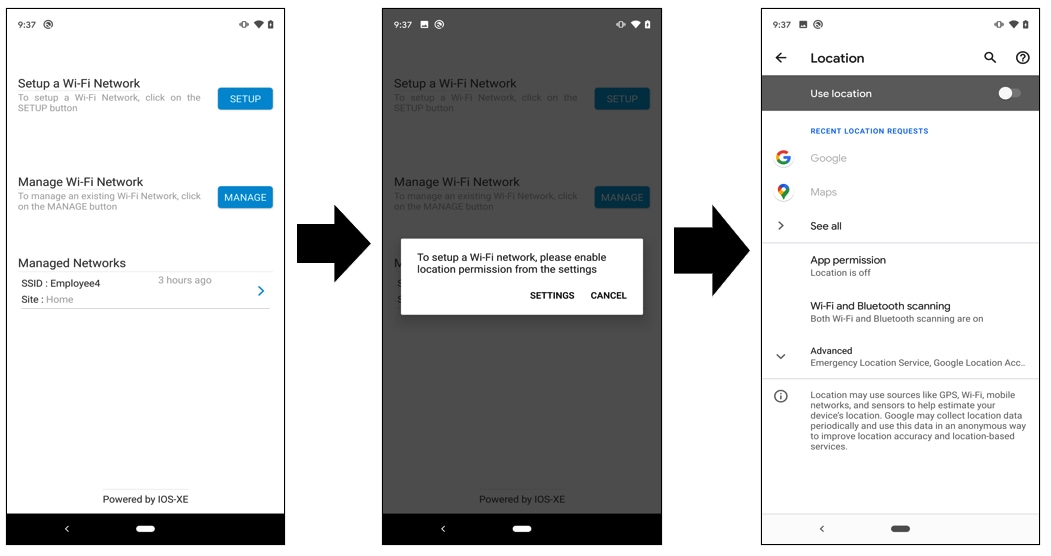
If your mobile device is compatible with Android 10, then you will notice the following behaviour:
- If device location is disabled, then you will receive a prompt to enable global device location before using the Cisco Catalyst Wireless mobile app instead of app-specific location.
- While using the mobile app, if the Wi-Fi settings on your mobile device is disabled or the mobile device is not connected to any SSID, a Wi-Fi panel appears. Depending on the case, this panel either displays an option to enable Wi-Fi or choose from a list of available SSIDs. This Wi-Fi panel displays a maximum of three SSIDs that are available for connection. To view all available SSIDs, click See More. Once the desired SSID is selected, a confirmation dialog box appears. Choose Connect to proceed with the SSID connection.
 Note If the Cisco Catalyst Wireless mobile app is terminated forcefully, then this connection to the SSID might be lost. However, the next time the mobile app is launched, the client device will automatically connect to the same SSID that was used previously with the app.
Provisioning the Network
Logging in to the Day 0 Wizard
Before you begin
Your mobile device needs to be connected to the CiscoAirProvision-xxxx SSID.
Procedure
Overview of the Day 0 Wizard
The Day 0 wizard of the Cisco Catalyst Wireless mobile app helps in the initial setup of your Cisco Embedded Wireless Controller network. You can configure certain basic parameters on the controller and network parameters to get your Cisco Embedded Wireless Controller network running.
Initial Network Configuration
Once you are logged in to the Day 0 wizard of the Cisco Catalyst Wireless mobile application, perform the following steps to configure the basic settings for your Cisco Embedded Wireless Controller network:
Procedure
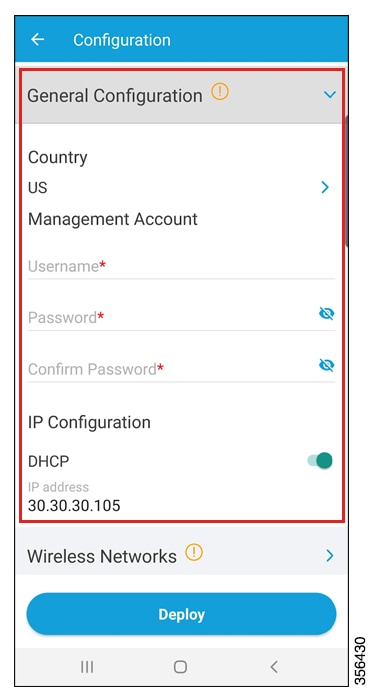
| Step 1 | On the Configuration page, under General Configuration, select the desired country from the Country drop-down list. |
| Step 2 | Under Management Account, enter the desired management credentials. Figure 8. Day 0 Wizard – General Configuration |
| Step 3 | Under IP Configuration, do one of the following: DHCP: Enable the DHCP option to get a dynamic management IP address. IP Address: Enter the static management IP address for the controller interface. |
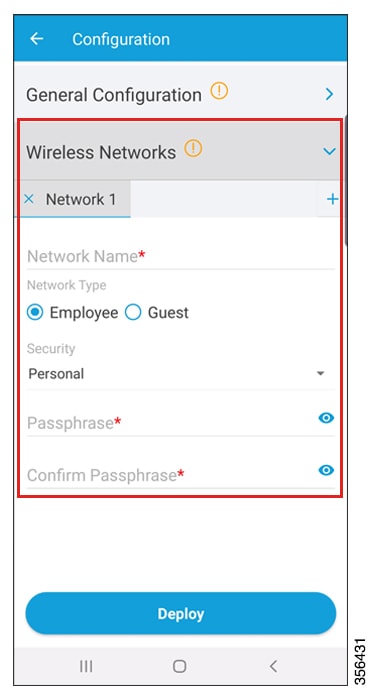
| Step 4 | Under Wireless Networks, click + to add a network SSID. Figure 9. Day 0 Wizard – Wireless Networks Configuration |
| Step 5 | In the Network Name field, enter the desired name. |
| Step 6 | Click the Network Type radio button to choose between Employee or Guest. |
| Step 7 | From the Security drop-down list, choose the desired security type. If you selected Employee in the previous step, the available options are Personal or Enterprise. The default security type is Personal. To know more about configuring Enterprise security, refer to the Configure AAA Server section. If you selected Guest in the previous step, the security type is fixed as Consent. Go to Step 11. |
| Step 8 | In the Passphrase field, enter a passcode. |
| Step 9 | In the Confirm Passphrase field, enter the same passcode entered in the previous step. |
| Step 10 | Click Deploy. A confirmation message is displayed. |
| Step 11 | (Optional) Click Review to review the configured network settings. The Summary page is displayed. Here you can view and edit the General Configuration and Wireless Network settings. |
| Step 12 | Click Deploy. A confirmation page appears where you can enter the site name and choose to Remember the configured site. Figure 10. Day 0 Wizard – Confirmation Page |
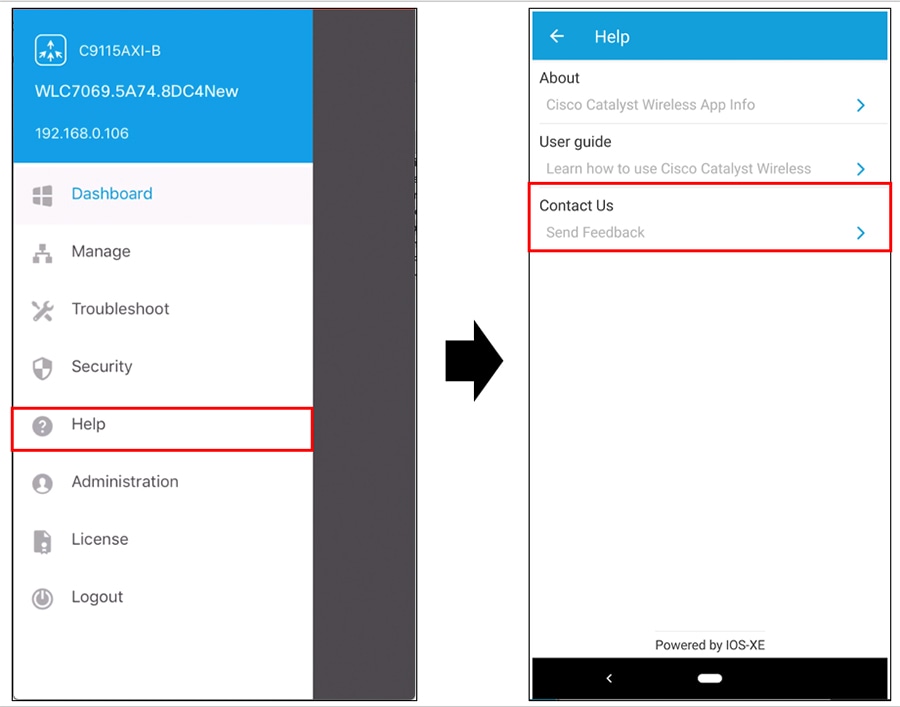
Feedback and Support
To submit feedback or to receive support for the Cisco Catalyst Wireless mobile application, write to catalyst-wireless-app-feedback@external.cisco.com or navigate to Help > Contact Us.
