Today, I conducted some testing on the Webex device by connecting a Logitech Presentation remote (R400). The testing was performed on the Desk Pro that I am using.
Note: Not all USB joystick remotes work, as I tried some low-cost joysticks and they were never detected as peripherals. Cisco states that the device must be on USB-HID class devices, and I believe that is the problem with some of the devices I tested.
The test cases involved using the R400 Laser Presentation Remote with the Desk Pro. The objective was to utilize the buttons on the remote to turn ON and OFF certain features of the device.
Thanks to my colleague who lent her Presentation Remote for the testing. Here is the picture of the remote that I used.

When a button is pressed on the USB input device, we can trigger some actions using the Cisco Device API.
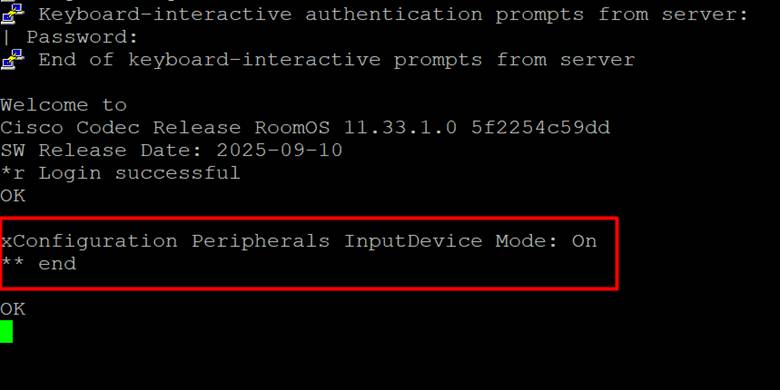
The default behavior of the input device on Cisco devices is turned OFF. You need to turn it ON by logging into the web interface of the device, clicking on Settings, and under Configurations, changing Peripherals > Input Device Mode to On or from the CLI using the command
xConfiguration Peripherals InputDevice Mode: On.

The status of the Peripheral Input device can be found from the CLI using the command
xConfiguration Peripherals InputDevice Mode.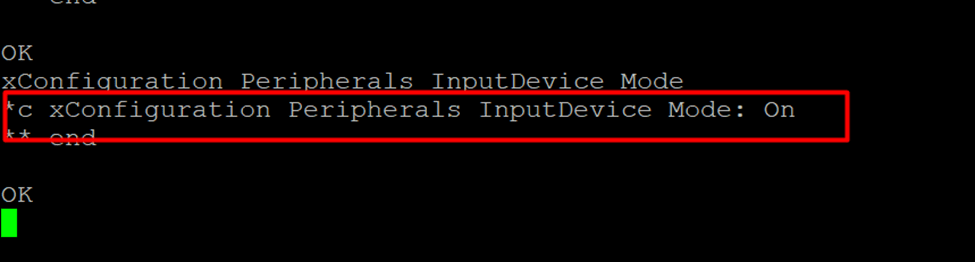
When you connect the Peripherals to a Cisco device, you can see the details either using the command line by SSHing to the device and issuing the command
xCommand Peripherals List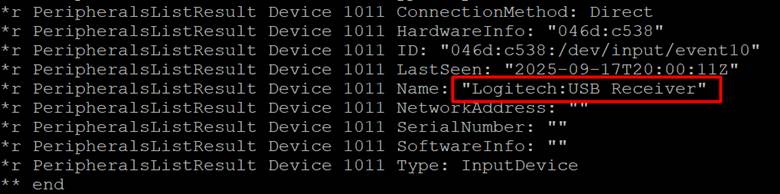
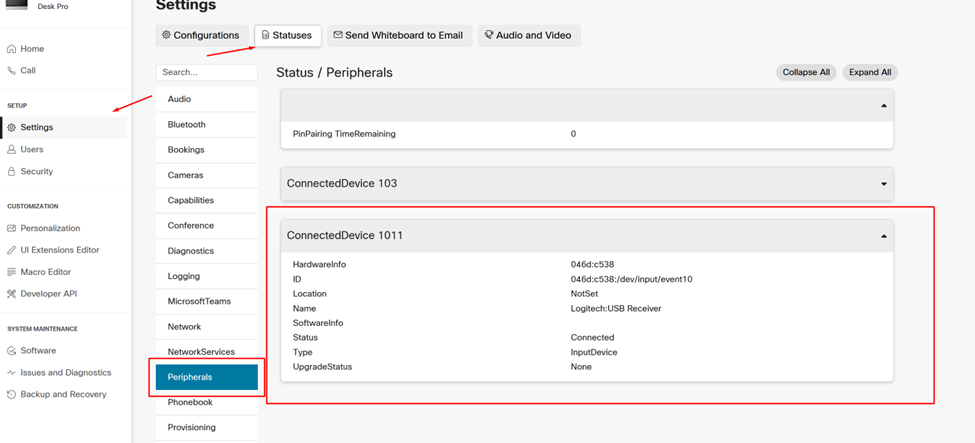
or from the Web under Status and in Peripherals > ConnectedDevice.
Now we need to register the feedback so that when a button is pressed, Cisco devices will get notified using the command
xFeedback Register /event/userinterface/inputdevice.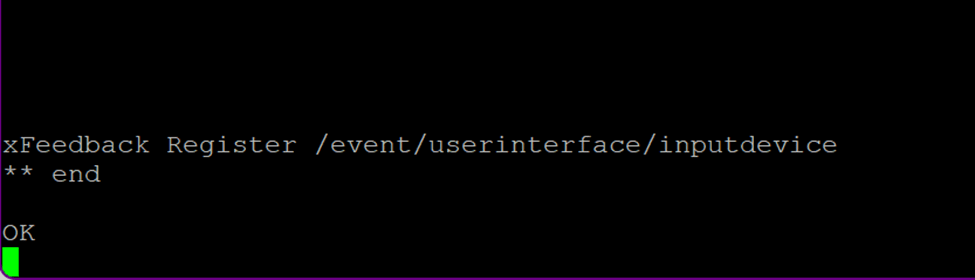
In order to program the Input and the action, we need to know the feedbacks the device registered with peripherals; issue the command
xFeedback list.Pressing the Right Arrow on the Remote, you can see that it got registered on the Cisco Device Page down Action

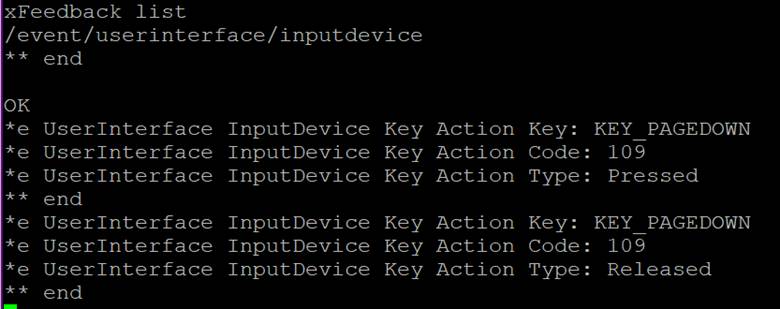
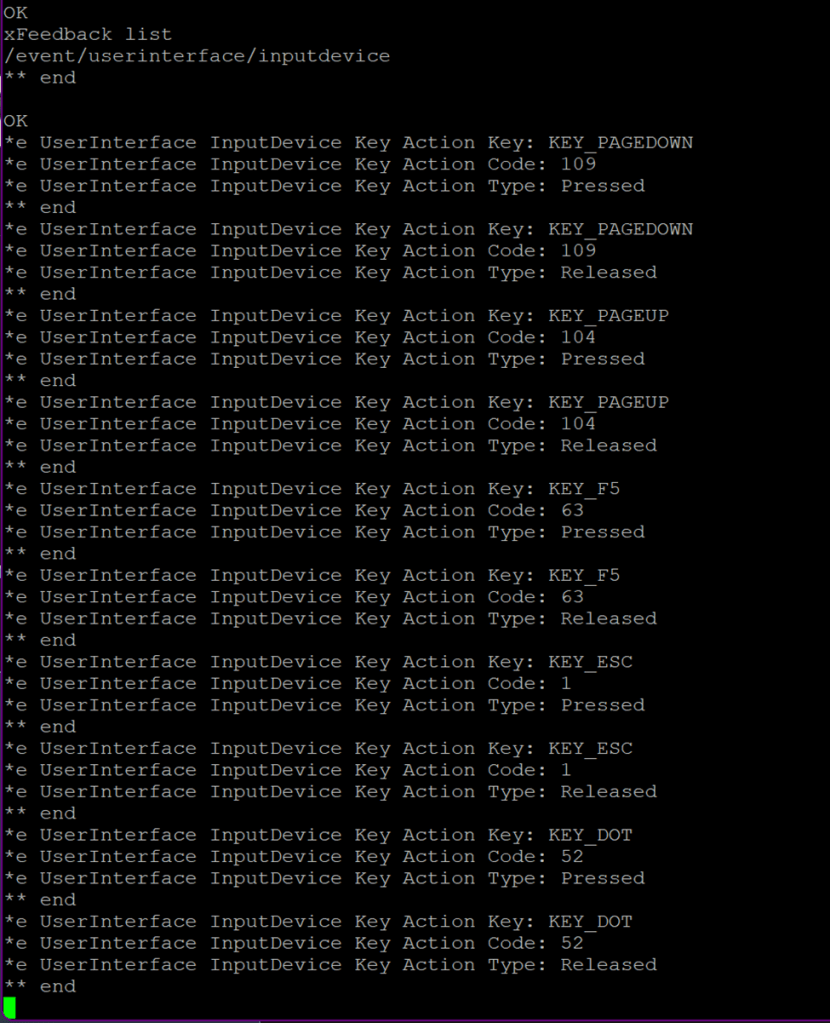
This will display the details of each button you pressed. You will see two events: one for pressed and one for released.
This was I’ve pressed the buttons and made a note of registered events.
Now let’s write a Macro to control the device based on the button pressed on the Remote.
The below macros are to activate the standby when the KEY_PAGEUP event occurs and move the device from Standby with Video Mute and Microphone mute when the KEY_PAGEDOWN event is pressed.
You can have multiple actions when an event occurs. In the above case, I use three actions for the KEY_PAGEDOWN event.
Both ‘KEY_F5’ & KEY_DOT I use for Volume Increase
‘KEY_ESC’ for Volume Decrease
“ xapi.command(‘UserInterface Message Alert Display’, {‘Title’: ‘Remote Control Warning’, ‘Text’:’This button is not in use yet. To program it use the “Key: ‘ + event.Key + ‘ (or Code: ‘ + event.Code + ‘)’, ‘Duration’: 2}); “
The above line displays the warning when a button which is not assigned to a particular action is pressed.
import xapi from 'xapi';

xapi.event.on('UserInterface InputDevice Key Action', (event) => {
  if(event.Type == 'Pressed'){
    switch(event.Key){
        case 'KEY_PAGEUP':
          xapi.command('Standby Activate');
          break;
        case 'KEY_PAGEDOWN':
          xapi.command('Standby Deactivate');xapi.command('Video Input MainVideo Mute');xapi.command('Audio Microphones Mute');
          break;
        case 'KEY_DOT':
          xapi.command('Audio Volume  Increase');xapi.command('Video Input MainVideo Unmute');xapi.command('Audio Microphones Unmute');
          break;
        case 'KEY_F5':
          xapi.command('Audio Volume  Decrease');
          break;
        case 'KEY_ESC':
          xapi.command('Audio Volume  Decrease');
          break;
        default:
          xapi.command('UserInterface Message Alert Display', {'Title': 'Remote Control Warning', 'Text':'This button is not in use yet. To program it use the "Key: ' + event.Key + ' (or Code: ' + event.Code + ')', 'Duration': 2});
          break;
    }
  }


});
How to configure this macro on the device is the next action.
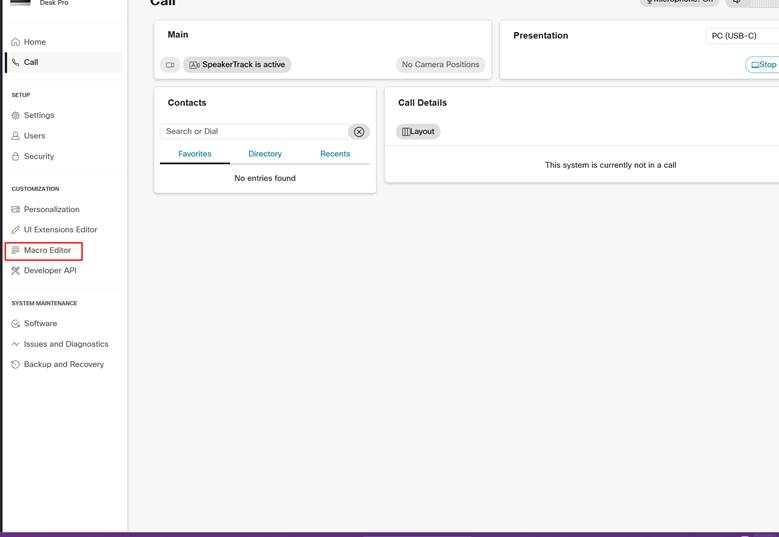
Go to the device webpage, and go to Macro Editor. Click on Create new macro and paste the Code.


Once the Code has been copied to the Editor space for the code to be downloaded to the device, click on the Download Icon on the New Macro you created.
Still, the Macro is not enabled. To enable it, toggle the Button and you will see a pale blue color on the macro if enabled.

